Thursday, June 30, 2011

Features: Emptying my 'To-do' folder : Part 1

I have a folder in favorites called 'projects I wanna try'. It's overflowing. It takes 4 scrolls to get through the whole list. It's ridiculous. So I'm going to feature some of them and when I want to do them come back and look at this post. There will be more posts like this with the rest of my 'to - do's'.... so here we go!

DIY Beaded Chandelier Tutorial by The Ambitious Procrastinator. I've been wanting to make one of these forever, and then I happened to find a tutorial, so it's in my future! Soon. Once I find a place to put it...

Fabric Box tutorial by BettyJoy. Love these.

Paper Flower key holder from Fiskars. I am going to make a whole bunch of these with maybe fabric flowers and make a belt/necklace holder... what do you think?


Singed Fabric Flower hair clip tutorial by Simply Vintage Girl. I tried this but my fabric won't curl up that much :(

Singed Fabric Flower Tutorial by Mrs Priss. Very pretty! Check out all of her other tute's too, they are all great and she's hilarious!


That's all for today!

Photobucket

Tuesday, June 28, 2011

FREE Advertising!

Hey guys! I just made an advertising tab in the left sidebar, I advise checking it out ASAP. :D

Love you all! I have the best followers and commentors EVER!

Photobucket

Sunday, June 26, 2011

RECIPE - Fried Mozzarella Sticks

Our Family loves mozzarella sticks. LOVES. But we never get them because they are sooo expensive. So we decided we'd try to make some, I looked up a recipe, printed it, and my mom made them. I honestly had many doubts... I mean alot of the time you make stuff like this and it either looks like junk and tastes good, or it tastes like junk and looks... well, like junk. Maybe that's just me. Basically everything I make looks like junk. Oh well. Anyway, they were DELISH! Like... HEAVENLY! Annnnd they looked good! They really looked store bought! And tasted store bought! YES!! So I figured if we could make them taste and look good, I ought'a share the recipe... right?


Here she is! This recipe made enough for 5 people to eat and be STUFFED!

Ingredients
2 eggs, beaten
1/4 cup water
1 1/2 cups Italian seasoned bread crumbs
1/2 teaspoon garlic salt
2/3 cup all-purpose flour
1/3 cup cornstarch
1 quart oil for deep frying
1 (16 ounce) package mozzarella cheese sticks

Directions
1. In a small bowl, mix the eggs and water.
2. Mix the bread crumbs and garlic salt in a medium bowl. In a medium bowl, blend the flour and cornstarch.
3. In a large heavy saucepan, heat the oil to 365 degrees F (185 degrees C).
4. One at a time, coat each mozzarella stick in the flour mixture, then the egg mixture, then in the bread crumbs and finally into the oil. Fry until golden brown, about 30 seconds. Remove from heat and drain on paper towels. (We found out they cool really quickly, and like most foods, they are best when warm.)


(this recipe was found on http://www.allrecipes.com/ )

Let me know if you made these and if you liked them!


Photobucket

Saturday, June 25, 2011

Pinterest

Ok, so I finally made a Pinterest account. Yes, I am way behind everyone. :D Oh well! The reason was I didn't have a FB or Twitter Account, and I still don't. I emailed Pinterest and asked them what I should do and if there was anyway I could sign up without FB or Twitter. Within a few hours they replied saying No, I had to have an account. :( She told me that I could create an account, sign up for Pinterest, and Delete my account if I wanted to. She told me Twitter was the easiest to sign up for, too. I am really happy with Pinterest, the lady who emailed me was very nice, helpful, and fast.


So I did create a Twitter account, sign up for Pinterest, and then delete my account. (I don't want a FB or T because they are just another thing to do, which is exactly what I DON'T need! I'm busy enough As-is! Plus my Parents don't think they are safe.)


I'm really glad I made a Pinterest account! I knew I would be... It really is addicting... actually my mom decided she's going to set limits for computer time because I was on pinterest like 24/7 for a few days...


Well, right now my computer won't let me link anything... maybe it's blogger. I'd like to switch to something else (like typepad.. etc.) if they would actually work! I mean I can't comment on any blogs, I have to push a few buttons and click a few things to post (I couldn't post normally, so thank goodness I have my dad who found out a way for me to post, even if it is a pain!) I guess now I can't link to anything.UGH! If you have any tips I'd REALLY appreciate them!
Or maybe you'll try to tell me and you can't comment either. :(


You might be able to find me by searching for Alyssa E. and scrolling down (I'm the one with a pink heart on a black background with and A on it.) Comment either here or there if you found me! I'd love to follow you!


This summer has really flewn by! I've not gotten ANY crafts done or spray painted ANYTHING! :'( *sobs* I only have one month left before school starts! And 2 of those weeks I am doing service projects all day. Yeah.


Photobucket

Thursday, June 23, 2011

TUTORIAL - Mum Hair Clip

(heheheheh... if you have good eyes you can see it says 'of doom' under the title.. :P)

Alright, today I finally got a craft done! And the best thing was... it worked great the first time! Like... when does that happen?!?! :D

Here's my first try:
I honestly love it! It's not like most flower hair clips that stick off like 3 inches from your head... :D *BIG FAT PUFFY HEART*
Here's try #2 which I did the tutorial for: (sorry, this photo was flipped but blogger hates my guts so it won't let me upload it straight... and I'm too lazy to try to figure out why....)
(sorry again.. I'm just loving these:)
Alrighty: TUTORIAL TIME!!

I don't feel like typing up all of the supplies again (lazy.. I know) so just read the picture and if you have any Q's just ask. :D Oh, for the flower patterns.. I just drew my own.. I totally advise printing some pic of an EVEN 5 petaled flower to use as your pattern.


1. You will need 8 large flowers, 5 small flowers (I accidentally did 9 small flowers and you just get a bigger, fuller flower.You can do 9 if you want this.) Don't try to cut all 8 large in the same cut like me... I warned you. (cut by 4's) Fold your fabric (sortof) like so:

2. Trace your image (and if you're lazy like me use a color close to the fabric's color... again, TRUST ME!*clearly I didn't in this pic...* )

3. Cut out all 8 large flowers. (no pic)


4. Fold your flowers in half... (EXACTLY LIKE THIS!!!)

5.Flip the halved flower over and put a dot of hot glue right in the middle bottom of the flower and fold (repeat with all large flowers):

Get your circle of felt and 4 petals ready...

6. Glue them on so that the only glue is in the middle (don't cover the whole bottom of the 'petal' with glue.):

7. Get your other 4 petals and glue them over the cracks.


8. I forgot if I already told you to cut and glue 4 (8 if you want a full mum clip.) of your small flowers..? Do that exactly how you did your big ones.

9. Glue the little flowers on just like you did the big ones.. over the cracks. do 1 layer (4 flowers) for a not-so-thick mum clip or 2 layers (8 flowers) for a thicker mum clip.


10. Get your last,lonely flower and fold it in half:

And then roll it up like so:


11. Turn it around and snip the end off:
12. Put a glob of glue in the middle of your 'mum' and stick the end you just cut off in the glue and hold it upright until it dries.
13. Use little blobs of glue on each of the 4 surrounding petals to attach them to the middle rolled thing. Sorry I'm REALLY bad at wording things!!
14. (I guess this counts as a step) fluff it up.

You can use this mum on a headband, pin/brooch, hairclip or ANYTHING! Be creative! Glue a few on a canvas for 3d art! I made mine into a hairclip.. the picture is really self explanatory:

Then stick it on the felt and voila! You have a stinkin' cute hair clip!


Now, If you are really lazy (which I'm pretty sure we have established I AM.) you can do the same thing with circles of fabric (oh, and for fabric I used old tee shirt jersey/knit) and get a sort of cute flower thingy:


I personally love the mums though! Totally worth the work of cutting out the flowers... ('cause you know... it took like.. 10 minutes... dang.. that's like ....forever....)


And this pic again because I love it so:


Thank you for reading! I LOVE comments... they make me giddy! each one is like a present on Christmas!


Photobucket

Monday, June 20, 2011

INSPIRATION: Fireplaces and Mantles

* UPDATES*

Alrighty, I'm trying to figure this out... I can't comment on most blogs, and I haven't gotten any comments for a while, so if you're reading this and you're having trouble too, click one of the 'like'/'love'/'hate' buttons. That way I know you are reading and I keep posting... :P


I really can't believe I have 67 followers already! I mean I like REALLY started blogging after Jan. 2011. CRAZY!! Thank you all! And if you read my blog but don't follow, you should really click the follow button, it takes so little time for you and it makes me feel so good!


I know it's summer now, but I've literally been busy all day every day for the past 2 weeks, so sorry for nothing crafty, it's driving me nuts to be doing nothing crafty!!! AHH! Hopefully this week will be un-busy!


Now for the actual post :D Sorry for rambling! So this post is about fireplaces and mantles and how to decorate them (sortof). Actually the reason I looked these up is because I need help decorating mine... So we can learn together :D


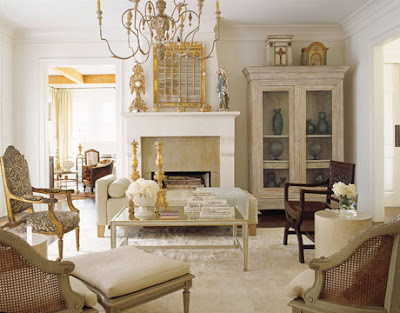
The bold color of the rug is so cool! I think it's really unique to have the books inside the fireplace, it's a good idea if you want something pretty and you never use your fireplace for... fire. This fireplace is alot like ours, but it's white. Oh how I despise you honey oak! It's really not possible for us to paint ALL of our trim white... but I WANT TO!!!!! The tiles on this fireplace are so pretty.
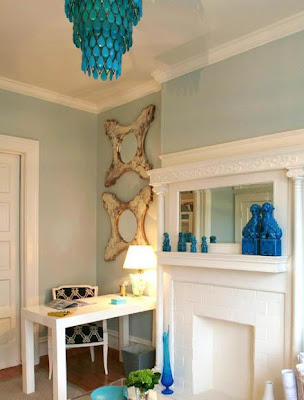
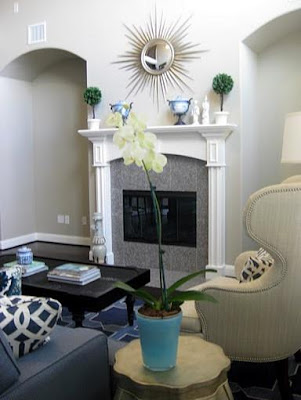
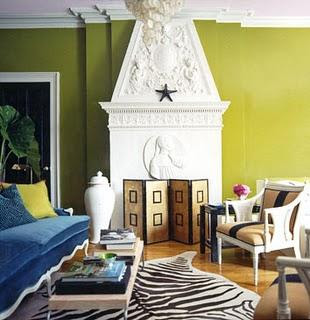
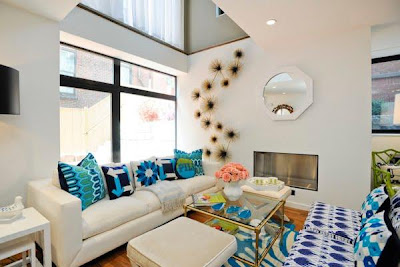
I like the bold pops of blue in this room, but I would have put some candles in the fireplace opening... it looks too empty!

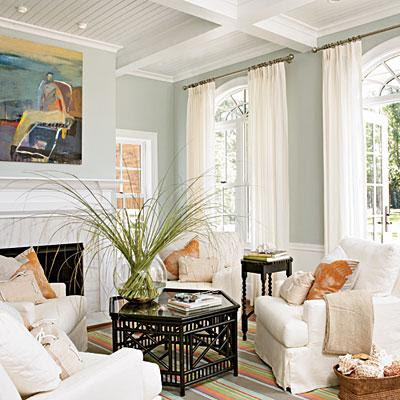
Light and airy. Oh how I loveth thee! I wish all of our honey oak could turn to light and airy .... somehow............ (can't wait until I buy my own house... don't worry I'll still be blogging when that happens :D)

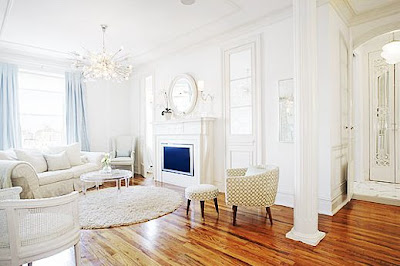
Ditto what I said on the last one. Mirrors above the fireplace are a good idea... when I find a cute one... that's where it's going.

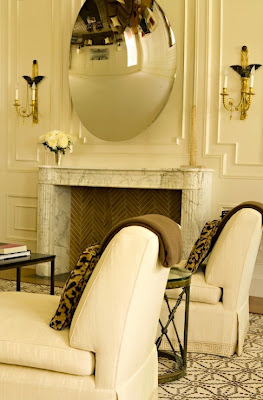
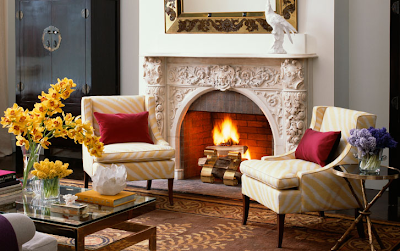
Really simply decorated fireplace. Beautiful room.
I love the tiled mirrors in the fireplace, really awesome idea! Dreamy room.
Love the plates on the mantle!

Stunning.
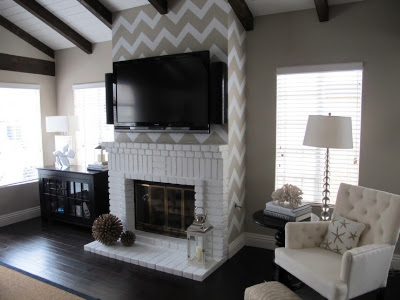
Oh my gosh! The chevron wall! Ahhhh!
Totally unique fireplace. I want built in's in our living room.
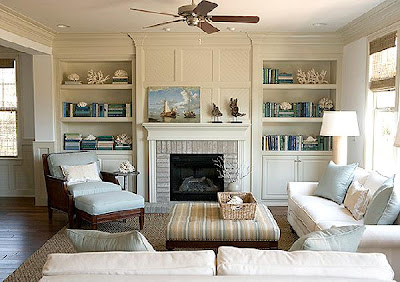
I like the beachy vibe this room has. More gorg. built-in's.
Love the mirror on the mantle and the idea of putting a cabinet (for lack of better word in my mind.) to the side of the fireplace if you can't have built in's.
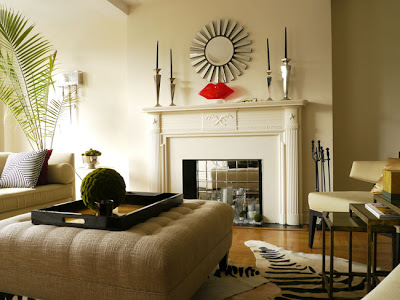
Not a very warm, home-y space, but the sunburst mirror is a beaut.!
I want that mirror for my room.

you can't really see in this picture, but there are a bunch of candle holders and a picture frame on the mantle. So simple and beautiful.

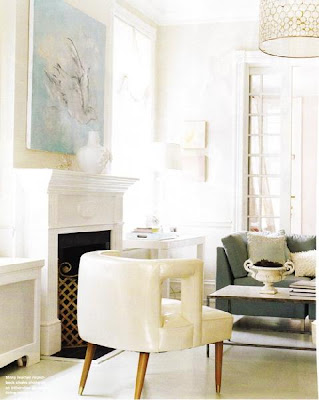
one large piece of art on the mantle. I like that this room has more color in it!
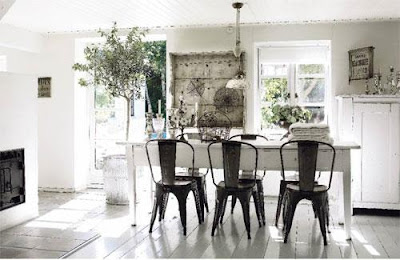
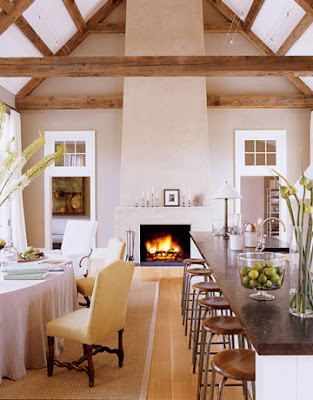
nice rustic kitchen. I know, I didn't post this pic because of the FP....
That fireplace would be so pretty glazed.
Love the color and this one needs to be glazed too...
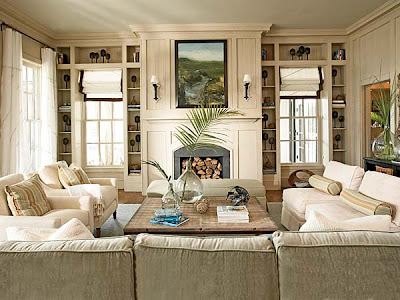
Fave built-in's so far. I love that there are windows in the middle! And the fireplace is full of wood, so it's sortof like it's own piece of art.
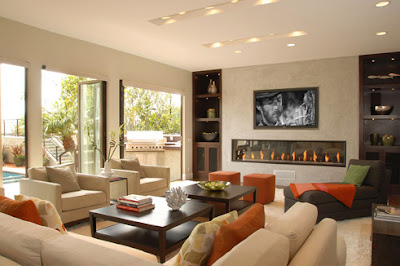
Super modern, colorful room! You can't really tell there is a fireplace there!
so flippin' airy!!!
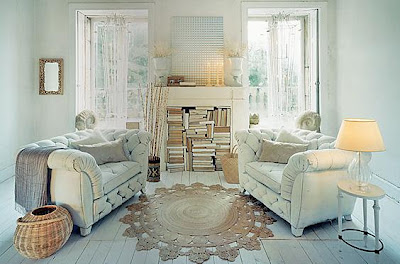
Very cool colored living room, not too home-y. Ilove the mirror on the mantle, and the doily rug, and how the FP is full of books. And the tufted couches.And the windows. oh, and the floor.... (just not the color scheme too much!)

I think the plants on the mantle look great. The color of the drapes... notsomuch. and I heart the inside of the FP.

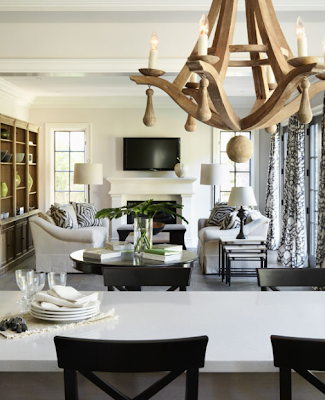
Mantle decorating: lots of little junk (don't get me wrong... it's gorgeous junk, and I love it :D) and one large artwork.

Ok, so I just love the art work... you could make it by glueing some fabric shapes (or paper/ cardboard... be creative) and spray painting it white.

Love the whole pic.


Well, that's the end! Thank you for reading!


*Does anyone know when the next design star starts? I can't findout anywhere!*


Photobucket