So, hi. :) My name’s Caroline and
I blog over at Pleats and
Pintucks. I actually just started the blog (and I do have to say that
although I had created my blog already, when I discovered Alyssa’s blog, I just
had to start posting. Because she’s just that awesome and she so inspired me.
Don’t y’all just love her?? I’m so blessed to know her personally! :)
and I’ve only got like eleven posts or something. And four followers. But
still, I really like it. :) I think I should stop
doing smiley faces now and really say something.
I’m fifteen years old and Catholic and homeschooled. I like
to diy and sew (anything that’s cute). And I spend waaay too much time reading
other people’s blogs or surfing for cool projects. I loved 2011 mainly because
I finally lived a dream…I went to France. Paris was, truly, people, all it’s
cracked up to be. You can read a little about it here. My post is the first
one. The blog was created as a one-time thing, so I don’t expect to be posting
anything else. But anyhoo. Back to craftiness. I really enjoy creating bags…I
think that’s pretty much the main thing I make…because I just can’t get enough.
Like shoes, you know? Love accessories. I also like making clothes…
I’d love for you to follow my blog and thanks for reading
this little blurb!
Thanks to Alyssa too for the best crafty blog out there and
for letting little ol’ me be a sponsor!
--
I’ve decided to share a crazy-easy tutorial with you for a
headband. It’s really not even considered a tutorial in my book, but it does
show I’m kind of crafty (heh.heh.), right?
1. Find (or buy) a comfortable headband.
2. Get out the glue gun and buy (or find) some trim or
ribbon.
3. Starting at one end, put a dot of glue on the back of the
headband and put the edge of the trim on to seal it off (ya know what I mean?).
4. Working in sections, put glue on the outside of the
headband (where you want the trim) and wrap the trim around, making sure to
stick it to the glue.
5. Finish the last edge the same way you started (again,
you’ll know what I mean).
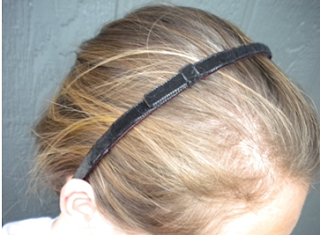
6. Put on! And don’t take silly pictures of yourself, like I did.
6. Put on! And don’t take silly pictures of yourself, like I did.
And, because I love you, here’s some pictures of other
headbands I’ve diyed:
I glued on a sparkly flower pin here…
And did the white trim again, this time with a bow, here..
And this is one of my favorites – black velvet with a bow
And a gold glitter headband. ;)
So yeah, go out there and make (literally!)
instant-gratification crafts! And visit my blog while you’re at it, because I’d
love to check out yours!
Go check out her new blog, Pleats & Pintucks, and follow along! I know she'll have a ton of great tutorials and such some day soon :) She also has a in-the-works shop for her hand-sewn purses, clutches, and more! Go to her blog to check it out!
xoxo
Alyssa
Go check out her new blog, Pleats & Pintucks, and follow along! I know she'll have a ton of great tutorials and such some day soon :) She also has a in-the-works shop for her hand-sewn purses, clutches, and more! Go to her blog to check it out!
xoxo
Alyssa


3 comments:
I was blog-hopping around and I somehow ended up here. Love the blog, so cuuuute!!
http://www.ivy-lauren.blogspot.com/
They turned out so nice.
Great idea!
Sherry's Bees Nest
I am the same way! I thought I was alone (: It's kind of weird for me to have people I know in real life read my blog too... so I totally understand. (:
Cute headbands- so simple yet so pretty!
Post a Comment