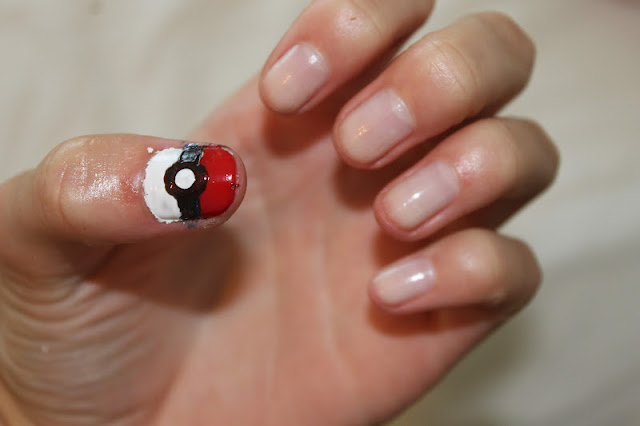
I grew up with one older brother. He was my biggest influence and my best friend ... I wanted to do everything he did and I lived most of my childhood being a big tomboy. We watched power rangers, monster trucks, scooby doo and pokemon. We climbed trees, built forts, played some intense pillow fights and everything like that. Dang I miss those days... haha! But Pokemon was huge with us. We both bought decks of cards and played pretty hard core :) And I will admit that a year and a half ago we got back into it and we went out and bought new decks and played every spare second for about a month until i was creaming him and he tried making the rules change for him (he always has done that) and I got mad and then we quit.
Anyways... moral of the story... I miss my brother. Okay no it's actually that I decided to make pokemon nails but I just realized how good of a life I have. Who knew God could work through something silly like this and make me appreciate life more? :)
ANYWAYS... enough with my ADD!! I made pokemon nails. And I want to show you how you can, too. So here we go, you ready?
You need: Red, black, white, base and top coat nail polish. tape.
1. the usual. Fix up the nails and base coat... you know the drill!
2. Get black. Paint a stripe down the middle of your nails like so:
 3. Wait for that to dry. Cut some painters tape (that's what I prefer to use... I think any kind will work!) in a small strip and put it on top right down the middle of the black.
4. Paint white on the bottom and red on the top. Let it dry and do a second coat if needed and immediately peel the tape off after your last coat.
5. Paint a black circle in the middle of each nail. Let it dry and do a smaller white dot in the middle of that.
6. Let it dry and then top coat and you're done!
Thanks for sticking around and I hope you enjoyed it!
Alyssa


1 comment:
Oh! These turned out awesome!
Post a Comment