
Supplies:
10 feet of 4.5 inch OD (outside diameter) PVC pipe ~ $10 - we bought ours at Lowe’s
Krylon Spray Paint ~ $4
JB kwik weld epoxy (4 minute dry time) ~ already had it
Tools:
Dremel
Miter saw
Table saw
Clothes pins/clamps
Level
Sandpaper 110 grit (don’t use 80 grit or less, it scratches it up badly.)
Tape measure
Pencil
(we had all of the tools... so FREE!)
Add it all up and we paid a whopping $14!
Since a 10 foot PVC pipe is hard to work with, cut it into an approximately 3 foot section. This will make it easier to work with on the miter saw.

Decide how deep you want your shelf to be. I choose to make mine 3 inches deep. NOTE: deeper shelves will be more difficult to work with while cutting.
Next you want to clamp a stopper board 3 inches (or whatever depth of a shelf you have chosen) from the blade on the miter saw. This will enable you to cut equal size tubes.

Now push the PVC up to the board and cut. This design will require 8 tubes (4 half circles and 6 quarter circles) NOTE: Each tube can be used to make one half tube or two quarter tubes. This is because the half tubes are about ¼ inch larger than exactly half of a tube. You will discard the small half of the tube. If the tube is cut exactly in half, then there won’t be enough surface area to glue the pieces together.


Next, you want to re-set your stopper board on the miter saw to 2.5 inches from the blade. This will create your semi circles. Use your miter saw and cut all 8 tubes into semi circles. Throw away the smaller portions.
Lay your pieces out to see how they are going to look.


Use a Dremel to rough up all of the surfaces that will be joined. This will ensure a better bond.

You will be building the top half of the shelf and the bottom half of the shelf separately and then gluing them together later. NOTE: You will need to make sure that you are keeping it level during each of the following steps.
Top: Mix some JB Weld epoxy and glue your 3 half circles together, making sure it’s level. Put a weight on top to hold it down. Use clothes pins to clamp the pieces together.


Position the two bottom semicircles on top of the piece you just glued, and make sure it's level. Mix some JB weld epoxy and glue the two bottom semicircles together.

When the glue on your top section is dry, glue a quarter circle on each side.


Repeat on bottom shelf.

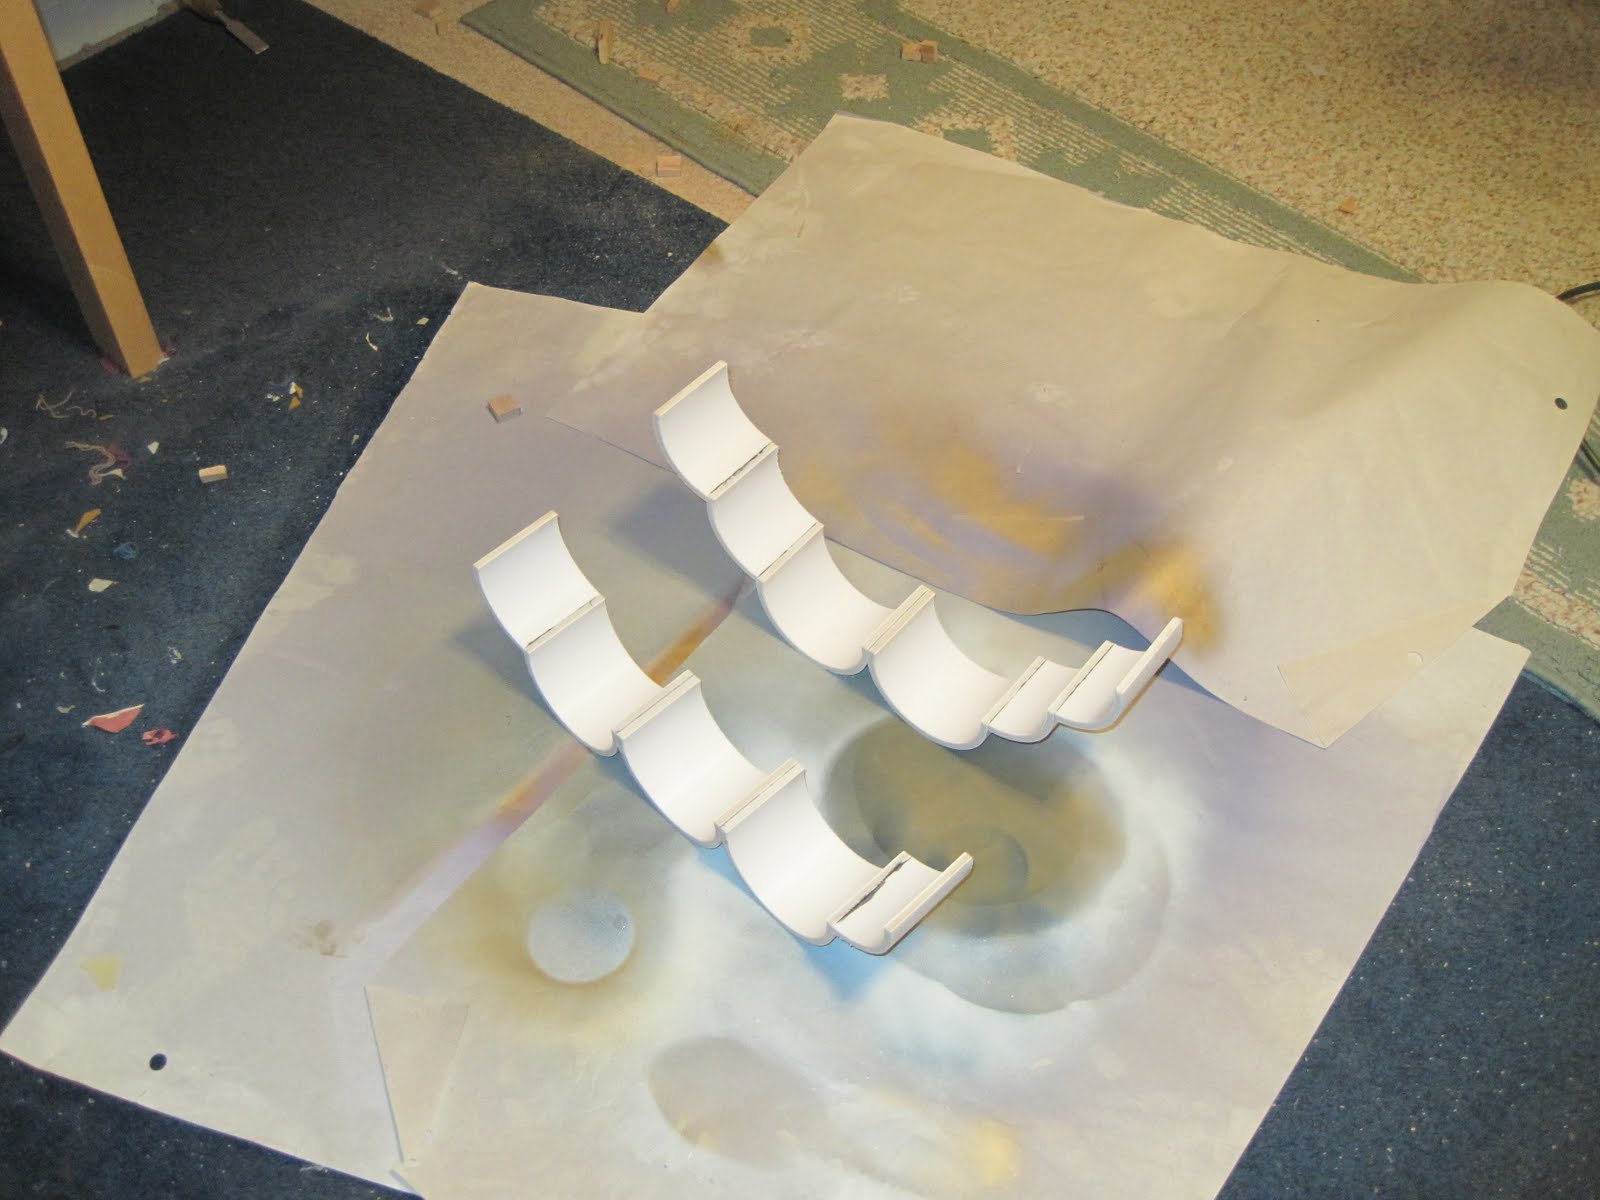
Add another layer of quarter tubes on the bottom shelf.

Now the top and the bottom sections are fully assembled. You will need to paint them before gluing them together so that you get paint in the small openings.
I just realised we forgot to take a picture of the spray paint! This is what kind we got.... The awesome thing is it matches one of the paint colors in my room EXACTLY!


Use your Dremel to remove the paint and rough the PVC up where the two sides join. Glue the top and bottom shelf together using JB Weld.


Use your table saw to cut a top and bottom shelf. Glue them on.
 Spray Paint the entire shelf using Krylon plastic fusion paint. Repeat until entirely covered.

You’re now done! Congratulations! If you like this project and or plan on making one, please comment! Thanks for reading!
Top: Mix some JB Weld epoxy and glue your 3 half circles together, making sure it’s level. Put a weight on top to hold it down. Use clothes pins to clamp the pieces together.


Position the two bottom semicircles on top of the piece you just glued, and make sure it's level. Mix some JB weld epoxy and glue the two bottom semicircles together.

When the glue on your top section is dry, glue a quarter circle on each side.


Repeat on bottom shelf.

Add another layer of quarter tubes on the bottom shelf.

Now the top and the bottom sections are fully assembled. You will need to paint them before gluing them together so that you get paint in the small openings.
I just realised we forgot to take a picture of the spray paint! This is what kind we got.... The awesome thing is it matches one of the paint colors in my room EXACTLY!


Use your Dremel to remove the paint and rough the PVC up where the two sides join. Glue the top and bottom shelf together using JB Weld.


Use your table saw to cut a top and bottom shelf. Glue them on.
 Spray Paint the entire shelf using Krylon plastic fusion paint. Repeat until entirely covered.
You’re now done! Congratulations! If you like this project and or plan on making one, please comment! Thanks for reading!

6 comments:
So creative! That blue is a great color! I haven't used the Krylon Fusion yet, but now that I know it works so well, I'm inspired to try it!
So clever and so cool! Great job! Can't beat the price. Love your creativity! :)
Roeshel
WOW--that is creativity to the next level.
Cheri
What a cool and innovative idea! It has such a cool design to it!
Thanks for sharing in FFA!
Hannah
What a great idea, I love it
This is neat! I love the unusualness of the design :)
Post a Comment