 But first, I'm going to show you the acrylic paints I basically stole from Joann's:
 (All were .25 except the enamels... the were .50 $)
Stencil (I'll make a tutorial for how I did this in the future)
Acrylic paints
Sandpaper
Foam/stencil brush
Piece of old wood
I found this piece of wood in my dad's scrap pile, It's nice because it isn't new and smooth, it's old and bumpy. :D So when choosing wood, try to get it weathered.

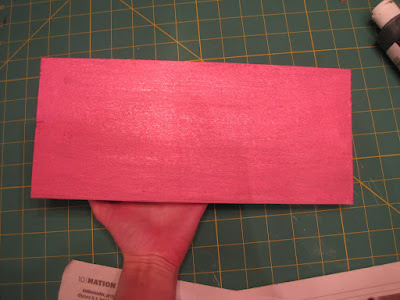
Paint your whole piece of wood desired color. No, my hand isn't neon pink... I made this at 10:30 pm, so the lighting stinks!
I had just made the stencil and I tried it out on the back of my wood. When I was done I wiped it off with a sponge and didn't dry it at all. Fail #1. Make sure you ALWAYS dry your stencil before using it! Now center your stencil and just lay it on.
 Press down the top and bottom of your stencil so it lays flat. If you have little hanging strips press them down too, this is easiest if your paint is barely damp.

Using your foam brush, dab a different color of paint on from the top. Don't actually brush it back and forth.

Continue all the way down, it should look something like this now:

Lift your stencil off. I was so mad when I saw this! This is why you dry your stencil off. If you don't you get lots of leaks. If you decide not to listen to me, and your sign looks like this, just let it completely dry. :D Trust me. That was my fail #2.
 (see, I tried it on the back and it worked PERFECTLY! Just had to show you for proof that my stencil did NOT fail :D I'm sort of proud of my stencil... 'cause it was ALL my idea! (meaning no one I've ever seen has ever made one out of a sheet of plastic.) :D :D :D)
 Oh, paint the edges too, if you want too!
 Press down the top and bottom of your stencil so it lays flat. If you have little hanging strips press them down too, this is easiest if your paint is barely damp.
Using your foam brush, dab a different color of paint on from the top. Don't actually brush it back and forth.

Continue all the way down, it should look something like this now:

Lift your stencil off. I was so mad when I saw this! This is why you dry your stencil off. If you don't you get lots of leaks. If you decide not to listen to me, and your sign looks like this, just let it completely dry. :D Trust me. That was my fail #2.
 (see, I tried it on the back and it worked PERFECTLY! Just had to show you for proof that my stencil did NOT fail :D I'm sort of proud of my stencil... 'cause it was ALL my idea! (meaning no one I've ever seen has ever made one out of a sheet of plastic.) :D :D :D)
 Oh, paint the edges too, if you want too!


4 comments:
I like the new blog layout.
That's cool, thanks for the tutorial :) I think your blog looks really nice, too!
So cute! You see, I love anything that looks old, like an antique. This definitely caught my eye!
With Love,
-Hannah
Now I'm definitely interested in how you made the stencil. It turned out great!
Post a Comment