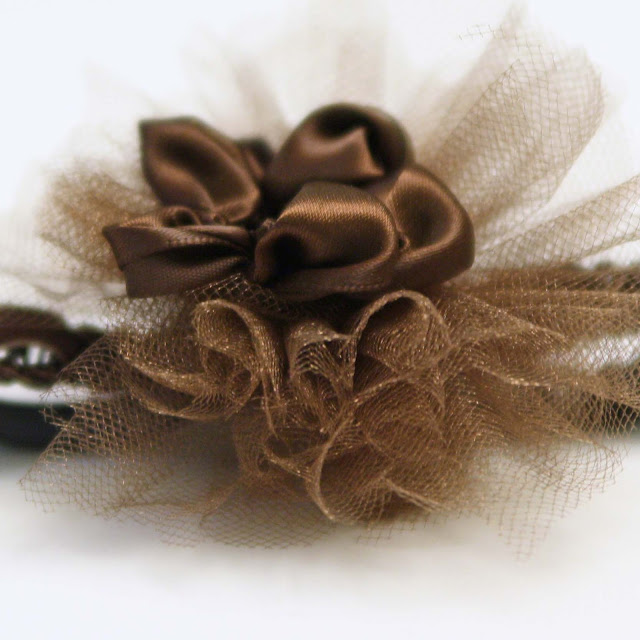
Today we have the wonderful Melissa from Melly Sews here with a tutorial on an adorable headband! The headband can be made in any size and looks super easy! Here's Melissa:
Today I made this headband
from the scraps left over after I made my Tulle Ruffle Skirt
and some 2 inch brown satin ribbon.
I had an 11" left over piece of the velvet ribbon, and about 40 inches of 3 inch wide tulle. Here's what I did. First, I sewed black elastic to each end of the velvet ribbon with a satin applique stitch (basically the widest zig-zag and the shortest stitch length on my machine).
Then I wrapped the tulle around a 3 inch piece of cardboard
I slid the tulle off the cardboard, and wrapped thread very tightly around the center.
I cut through the loops at the ends, and that made the pom-pom pouf part of the headband
I sewed this pouf onto the headband with a few stitches. Next, I made the flower. To do this, sew gathering stitches across the bottom of the ribbon
About every 1 1/2 inches, loop the thread over the ribbon, then sew another gathering stitch
Now pull the thread tight - it will start to pull the ribbon into little petal shaped poufs. You'll have to help shape them a little, and it works better for me if I do it after each time I loop the thread over instead of waiting until the end.
After you have 6 little poufs, cut the ribbon but not the thread. Take one of the end poufs into the middle, folding in raw edges, and take the other end and join it to the rest of the petals. Sew a couple of stitches into the middle, to keep that pouf in place.
Sew this flower into the center of the tulle pouf and onto the headband and you're done.
It could be perfect for you, or you might have a little cutie who needs one, like I did!
Isn't it adorable? {and the baby!!!} Thank you so much for guest posting, Melissa!
xoxo,
Alyssa


1 comment:
Oh so cute! And it doesn't look that hard.
Love you blog. Check out mine.
Laurel
laurelscrazylife.blogspot.com
Post a Comment